Compute the Option Price
In this section you will do the following:
- Create the pricing script in Financial Model Builder.
- Create a flow in Flow editor to call the pricer from Financial Model Builder.
- Create the UI components to call the pricing script and display the results.
Create a Form
To create a form in the UI
- Go to the Quandl workspace, and open the Option Pricer board.
- Switch to Design mode, and select the left frame. This is the location where you will add a form that you will use to send the requests for pricing to Financial Model Builder.
- On the components toolbar, find and select the Form component.
- Configure the form as follows:
- Title:
Pricer. - In the Options section, select Schema.
- Copy and paste the following schema definition into the text area:
{ "title": "EQ Option Pricer", "type": "object", "properties": { "strike": { "type": "number", "default": 0, "description": "" }, "spot": { "type": "number", "default": 0, "description": "" }, "as_of_date": { "type": "string", "format": "date", "default": "", "description": "" }, "maturity_date": { "type": "string", "format": "date", "default": "", "description": "" }, "type": { "type": "string", "enum": [ "put", "call" ], "default": "call", "description": "" }, "equity": { "type": "string", "enum": [ "FB" ], "default": "FB", "description": "" }, "comment": { "type": "string", "maxLength": 20, "description": "" } } }- In the Actions section, select Create actions, and enter the following:
- Display name:
Price - Action name:
call_price.
- Display name:
- Click to add the action to the form as the button that you use to trigger the pricing request.
- Title:
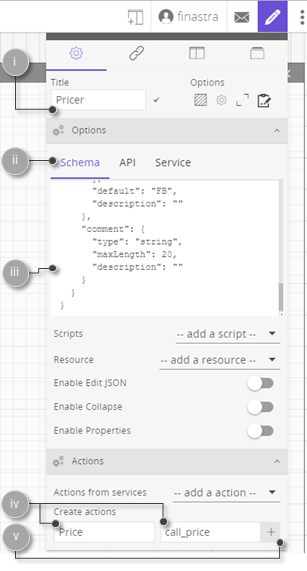
Fig. 60: Configure the form used to send the pricing request.
- Switch off the Design mode to visualize the form in the Option Pricer board.
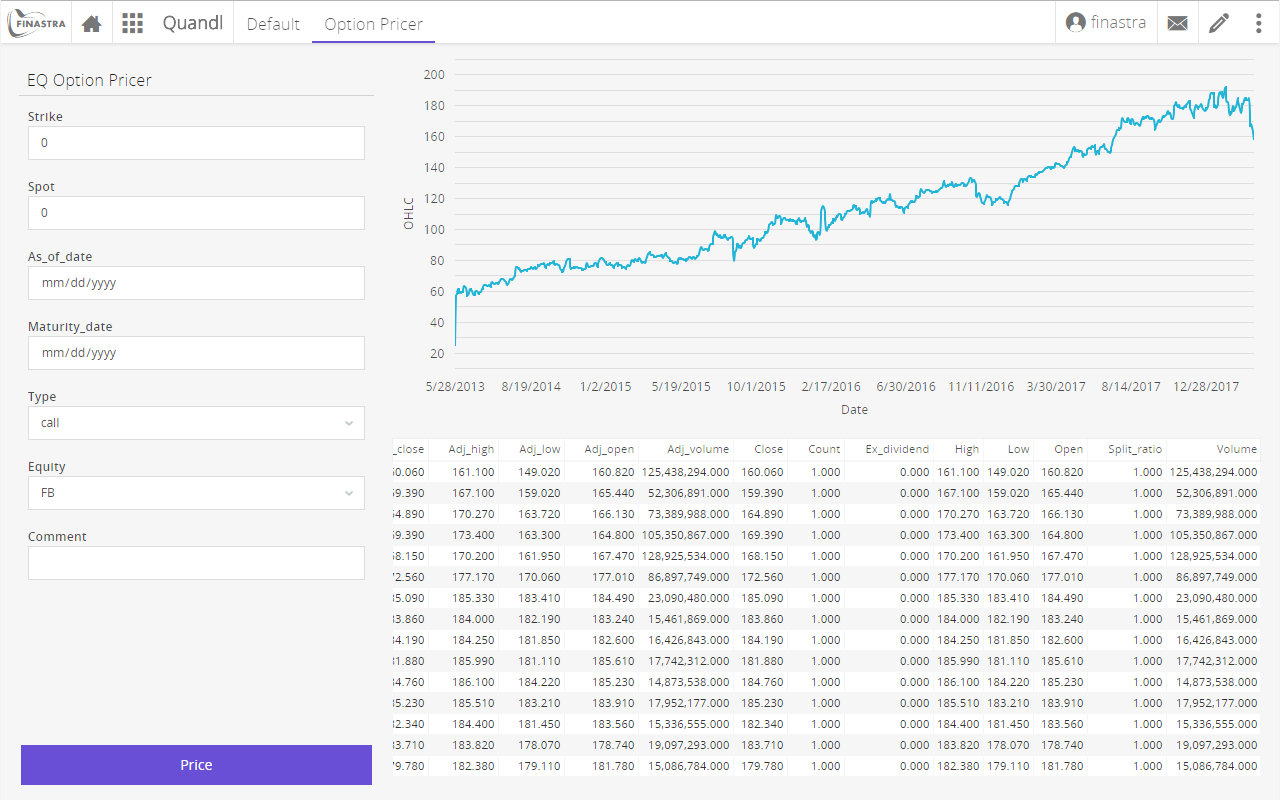
Fig. 61: The form for submitting the pricing request to .
Define a Custom Pricer in FFDC Valuation
In this section you create the pricing script in Financial Model Builder. You start from the files that you created in the European Options section of Financial Model Builder documentation.
To define a custom pricer in Financial Model Builder
- Log into Financial Model Builder.
- Create a script file in
src/main/resources/library/scripts/, and name ittutorial_OptionPricer. - Open the newly created script, and paste the following code:
// DATA FROM THE DOCUMENT FILES
def tau = yearFraction(calculationDate(), maturity_date, "ACT/365.FIXED", YearFractionParameters()) // Time to expiry as a fraction of a year with basis 365

// DATA FROM THE PRICING DATA FILE
def S = getEquitySpot(stockdata.name, calculationDate())

def vol = data0D("Volatility", [stockdata.name], calculationDate())

// CALCULATION OF THE OPTION VALUE
def Option_Value = getVanillaBS(type, S, strike, vol, tau, r , D) // Option value

return Option_Value- Deploy your Financial Model Builder library as explained in the Valuation Editor section of the Financial Model Builder documentation. Your option pricer script is now accessible via REST calls, through FusionFabric.cloud API Management.
Create the Flow of the EQ Option Pricer
To create the option pricer flow
- On the home page, click in the top-right corner to open the Tools hub, and then click to switch the UI to Flow editor mode.

Fig. 62: Switch the UI to Flow Editor module.
- Create a new flow and name it EQ Option Pricer Flow. From the Flow Menu select Import > Clipboard.
- Copy the following code, and paste it into the text area of the Import nodes window.
[
    {
        "id": "c03eeda6.50eb9",
        "type": "mb-http-in",
        "z": "58182884.f66d18",
        "name": "price",
        "method": "post",
        "url": "/5d575dab-7220-fa59-32ac-d3b3190a52a1/Price",
        "swaggerDoc": "",
        "x": 110,
        "y": 40,
        "wires": [
            [
                "78794f39.5b924"
            ]
        ]
    },
    {
        "id": "78794f39.5b924",
        "type": "function",
        "z": "58182884.f66d18",
        "name": "getFormPayload",
        "func": "\nmsg.strike = msg.payload.value.strike\nmsg.spot = msg.payload.value.spot\nmsg.maturity_date =  msg.payload.value.maturity_date\nmsg.asOfDate = msg.payload.value.as_of_date;\nmsg.type = msg.payload.value.type\nmsg.equity = msg.payload.value.equity\nmsg.volatility = 0.0221\n\n//today = new Date();\n//today = today.getFullYear() + \"-\" + (today.getMonth()+1) + \"-\" + today.getDate();\n//msg.asOfDate = today;\n\n//msg.asOfDate = \"2018-01-25\"\nmsg.D = 0.01\nmsg.r = 0.005444\n\n\n\n\nreturn msg;\n",
        "outputs": 1,
        "noerr": 0,
        "x": 200,
        "y": 100,
        "wires": [
            [
                "6188b503.401a9c"
            ]
        ]
    },
    {
        "id": "6188b503.401a9c",
        "type": "function",
        "z": "58182884.f66d18",
        "name": "getAuthorization",
        "func": "msg.headers = {\n\"Authorization\" : \"Bearer \" + msg.req.user.authTokens.master.access_token,\n\"Ocp-Apim-Subscription-Key\": \"<your_api_key>\"\n};\nreturn msg;",
        "outputs": 1,
        "noerr": 0,
        "x": 320,
        "y": 160,
        "wires": [
            [
                "34dc344d.0c87fc"
            ]
        ]
    },
    {
        "id": "34dc344d.0c87fc",
        "type": "template",
        "z": "58182884.f66d18",
        "name": "fmb-document-template",
        "field": "payload",
        "fieldType": "msg",
        "format": "handlebars",
        "syntax": "mustache",
        "template": "{\n  \"documents\": [\n    {\n      \"dealStamp\": \"DOC1\",\n        \"type\" : \"{{type}}\",\n      \"maturity_date\": \"{{maturity_date}}\",\n      \"strike\": {{strike}},\n      \"D\": {{D}},\n      \"r\": {{r}},\n      \"value_date\": \"2017-04-25\",\n      \"stockdata\": {\n        \"currency\": \"USD\",\n        \"instrument\": \"EQUITY\",\n        \"name\": \"{{equity}}\"\n      }\n    }\n  ],\n  \"pricingData\": {\n    \"dates\": [\n      \"{{asOfDate}}\"\n    ],\n    \"scenarioData\": [\n      {\n        \"id\": {\n          \"parameters\": [\n            \"{{equity}}\"\n          ],\n          \"type\": \"EQUITY\"\n        },\n        \"metaData\": {},\n        \"points\": {\n          \"{{asOfDate}}\": [\n            {\n              \"values\": [\n                {{spot}}\n              ]\n            }\n          ]\n        }\n      },\n      {\n        \"id\": {\n          \"parameters\": [\n            \"{{equity}}\"\n            ],\n            \"type\": \"Volatility\"\n        },\n        \"points\": {\n           \"{{asOfDate}}\": [\n            {\n              \"values\": [\n                {{volatility}}\n              ]\n            }\n          ]\n        },\n        \"metaData\": {}\n      }\n    ]\n  }\n}",
        "output": "json",
        "x": 390,
        "y": 240,
        "wires": [
            [
                "512768f1.447418"
            ]
        ]
    },
    {
        "id": "512768f1.447418",
        "type": "http request",
        "z": "58182884.f66d18",
        "name": "getOptionPrice",
        "method": "POST",
        "ret": "obj",
        "url": "https://{host}{basePath}/library/FMB/script/tutorial_OptionPricer/execute ",
        "tls": "",
        "x": 440,
        "y": 320,
        "wires": [
            [
                "3bb42837.b950c8"
            ]
        ]
    },
    {
        "id": "3bb42837.b950c8",
        "type": "function",
        "z": "58182884.f66d18",
        "name": "prepareHtml",
        "func": "option = msg.payload.results[0].values[0];\noption = option.toPrecision(3);\nmsg.payload ='<!DOCTYPE html><html><body><h1>$heading</h1><p></p></body></html>'\nmsg.payload = msg.payload.replace('$heading', option)\nmsg.option = option;\nreturn msg;",
        "outputs": 1,
        "noerr": 0,
        "x": 490,
        "y": 400,
        "wires": [
            [
                "5f40e33f.2b8eac"
            ]
        ]
    },
    {
        "id": "5f40e33f.2b8eac",
        "type": "mb-http-out",
        "z": "58182884.f66d18",
        "name": "html-out",
        "x": 620,
        "y": 480,
        "wires": []
    }
]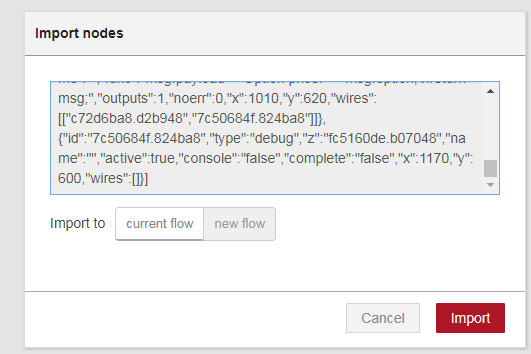
Fig. 63: Import a flow from Clipboard.
- Click Import to import the flow. The nodes that compose the flow are added to the dashboard in a new flow called EQ Option Pricer Flow. The flow is imported, but you must configure the connection to Financial Model Builder, as further explained.
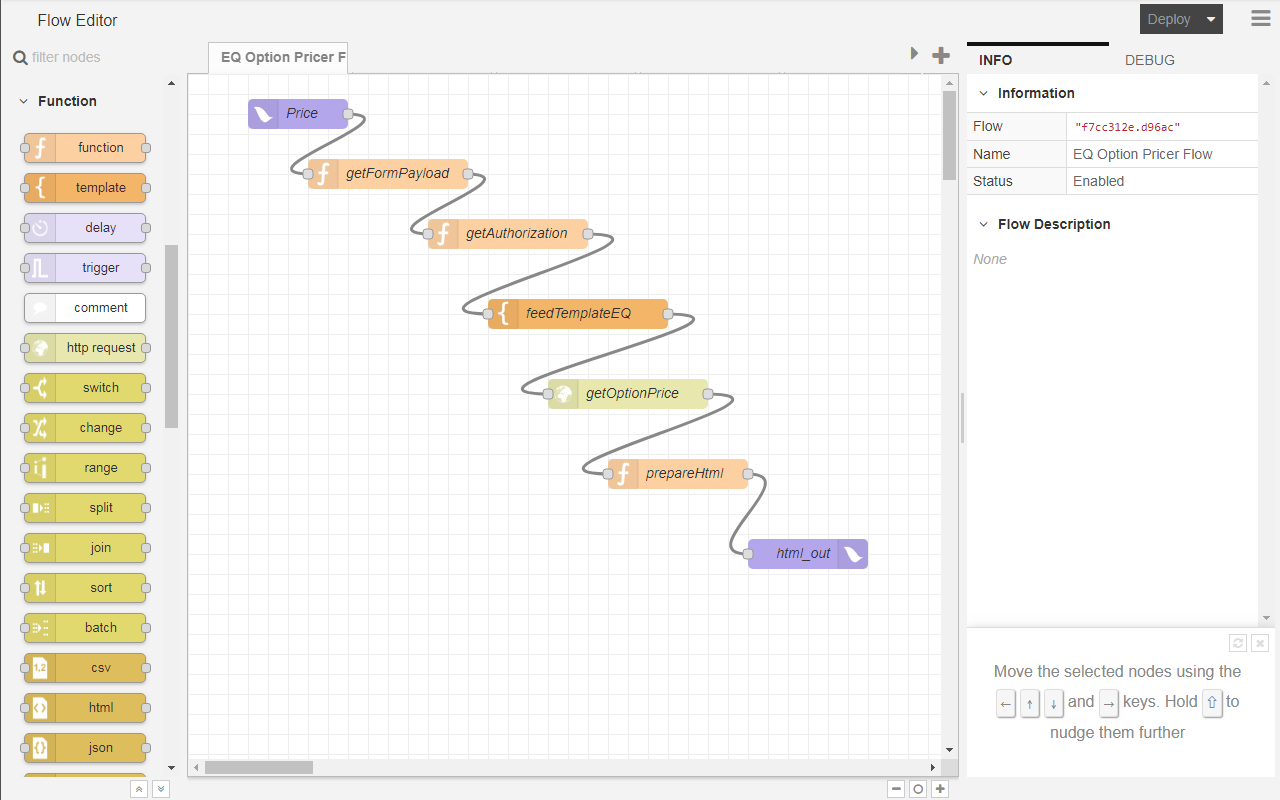
Fig. 64: The flow for calling the option price computation from Financial Model Builder.
- Double-click the
Authorizationnode, and then replace<your_API_key>with your Financial Model Builder API key.
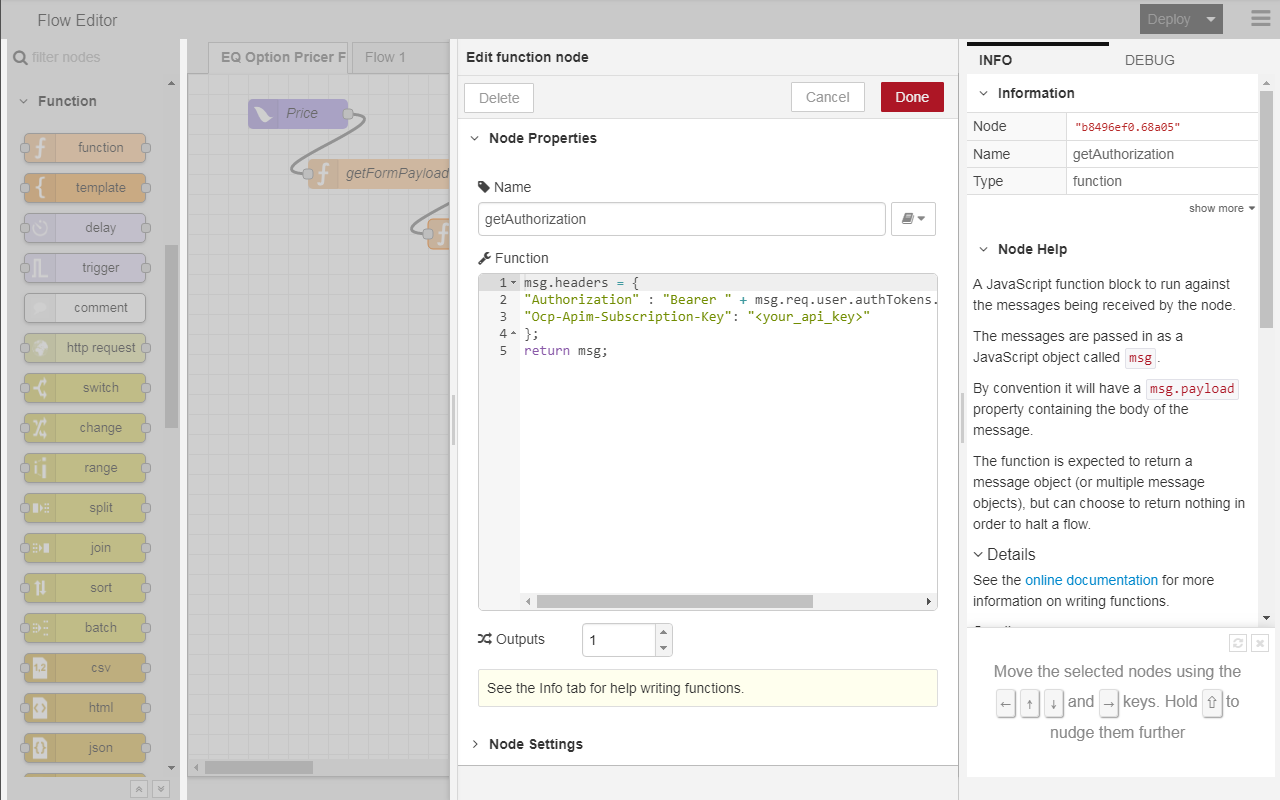
Fig. 65: Use your Financial Model Builder subscription key.
- Double-click the getOptionPrice node to open the node where you configure the connection to the Financial Model Builder to execute the pricing script.
- In the URL field, replace
{host}{basePath}with the appropriate values from the API definition. To get the API definition, see Get Started with Finastra Open APIs.
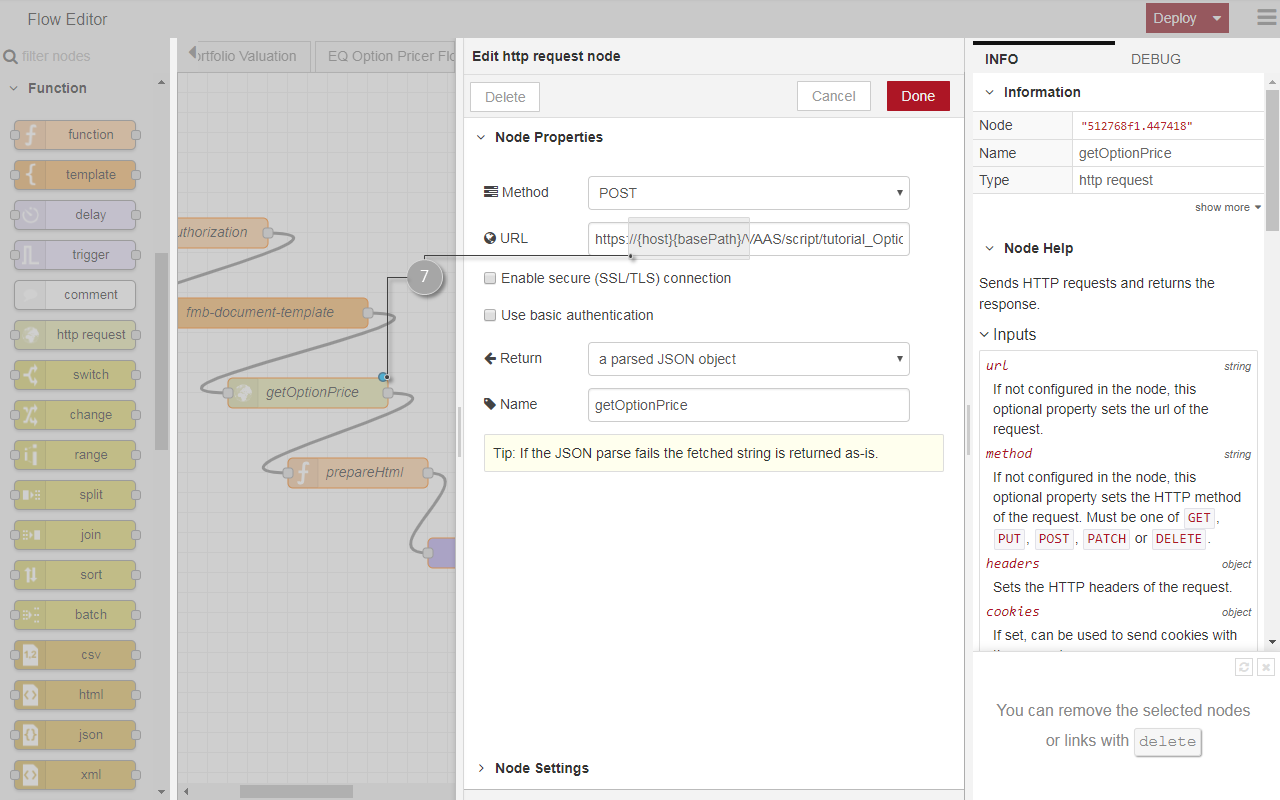
Fig. 66: Set up the connection to Financial Model Builder to call the computation script.
- Click Deploy to deploy the EQ Option Pricer Flow to your FusionCreator App Builder environment. You can now call it through the Link Editor module of FusionCreator App Builder.
Notes
- Your flow is now configured to connect to Financial Model Builder, and call the pricing script to retrieve the option price based on the input that you send from FusionCreator App Builder.
- You configured a flow with two endpoints:
- One action: the Price node. This node is of
uxp intype, and it is designed to receive HTTP requests from the UI. - One event: the html_out node. This node is of
uxp outtype, and it is designed to send its message to UI components.
- One action: the Price node. This node is of
- You can add debug nodes to your nodes. However, make sure you turn them off when you use the flow in production, as it may impact the performance of the application.
Link the Price Form to the EQ Pricer Flow
You are now ready to link the front-end form, the Price form, to the back-end flow, the EQ Option Pricer flow, that allows you to compute the option price.
To link a UI form to the EQ Option Pricer flow
- If your UI is still in the Flow Editor module, go back to the Option Pricer dashboard.
- Switch the UI to Design mode. You must add a component that will display the result of the option pricer flow.
- On the component toolbar, find and select an HTML component.
- Configure the HTML component to compile the HTML that is set as its content and re-size and drag the HTML component to an appropriate location.
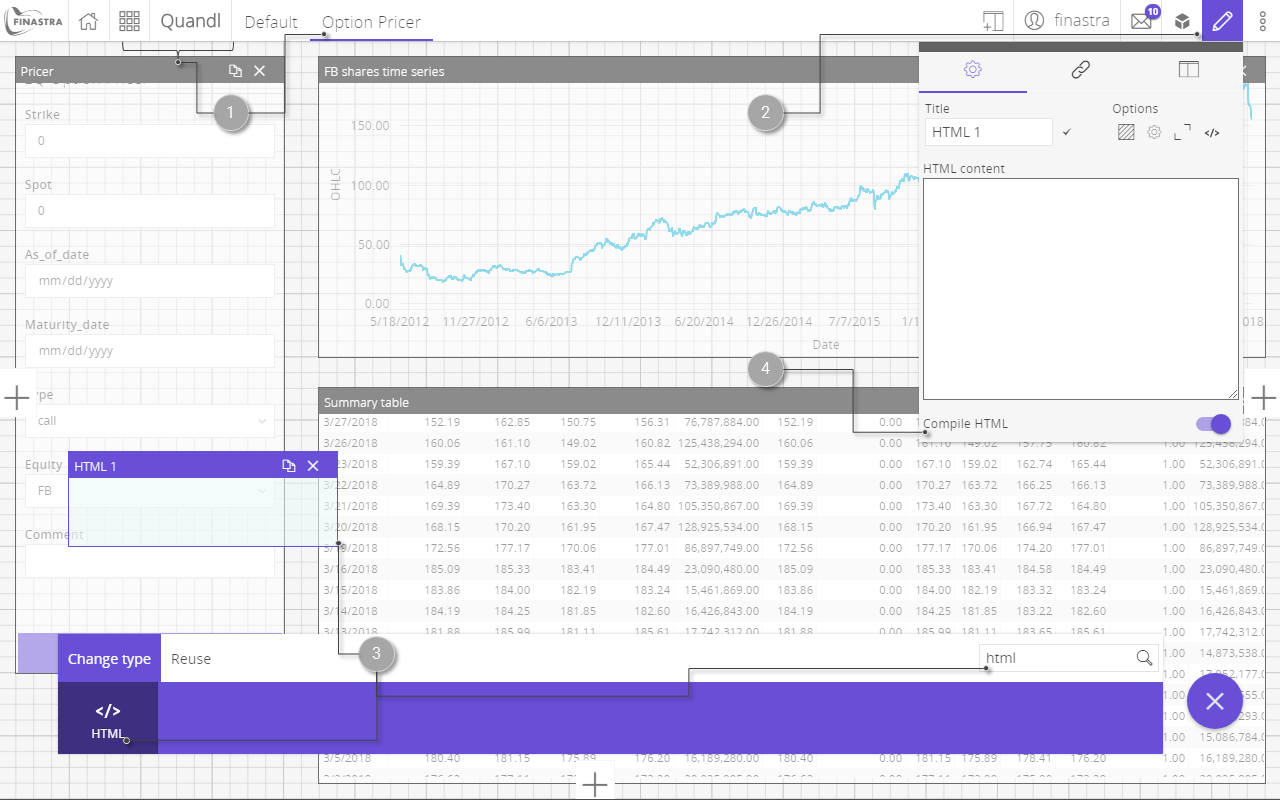
Fig. 67: Add an HTML component to the UI that will display the option price retrieved from .
- Turn of the Design mode of the UI. You have now the input and the output of the EQ Option Pricer. In the following steps you link them together.
- Switch the UI to Link Editor mode. This opens a dashboard where you add the existing UI components and configure their interaction. You do that by linking 2 components together, so that an action (output in component 1) triggers an event (input in component 2).
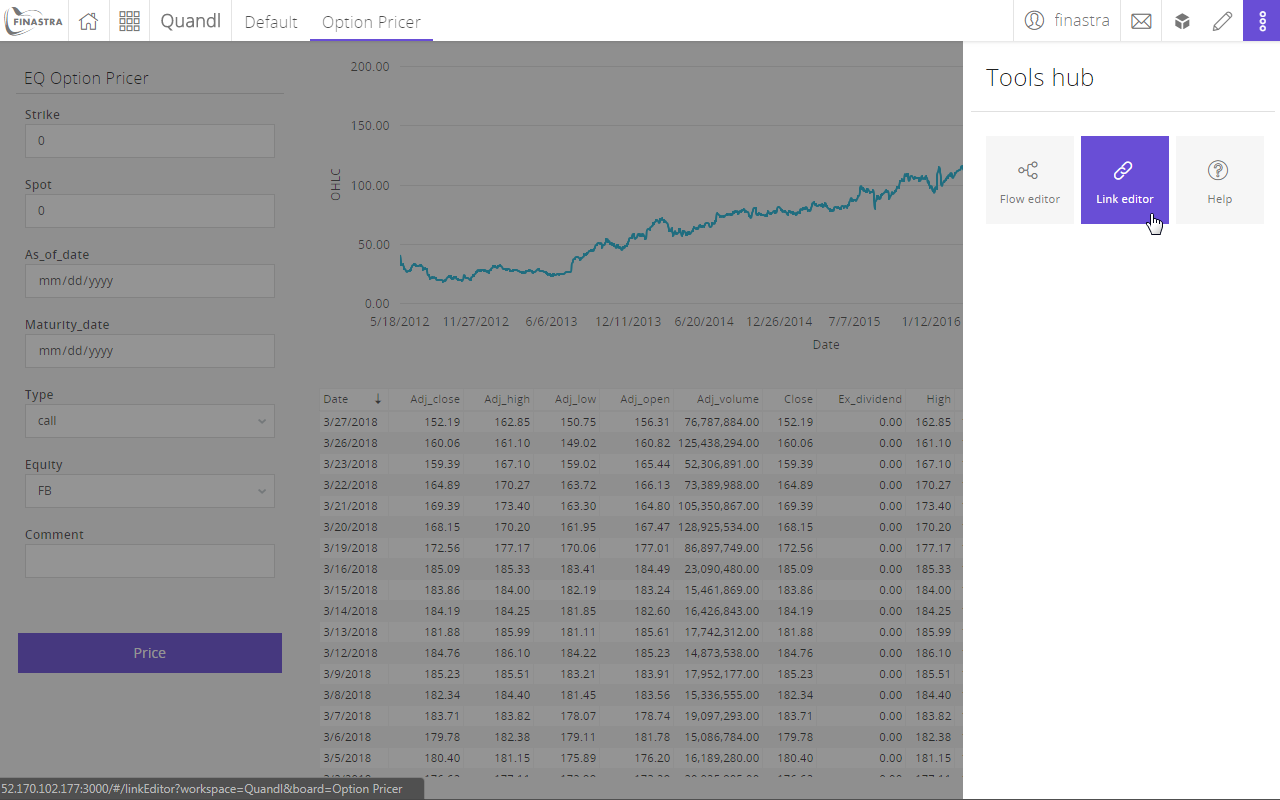
Fig. 68: Switch the UI to Link Editor mode.
- Switch the component toolbar to the Reuse tab, to list all the components that you added to the UI.
- Find and select the Pricer form. The form is added to the link dashboard as a box, and you can see its action endpoints on the left side, and the events endpoints on the right side.
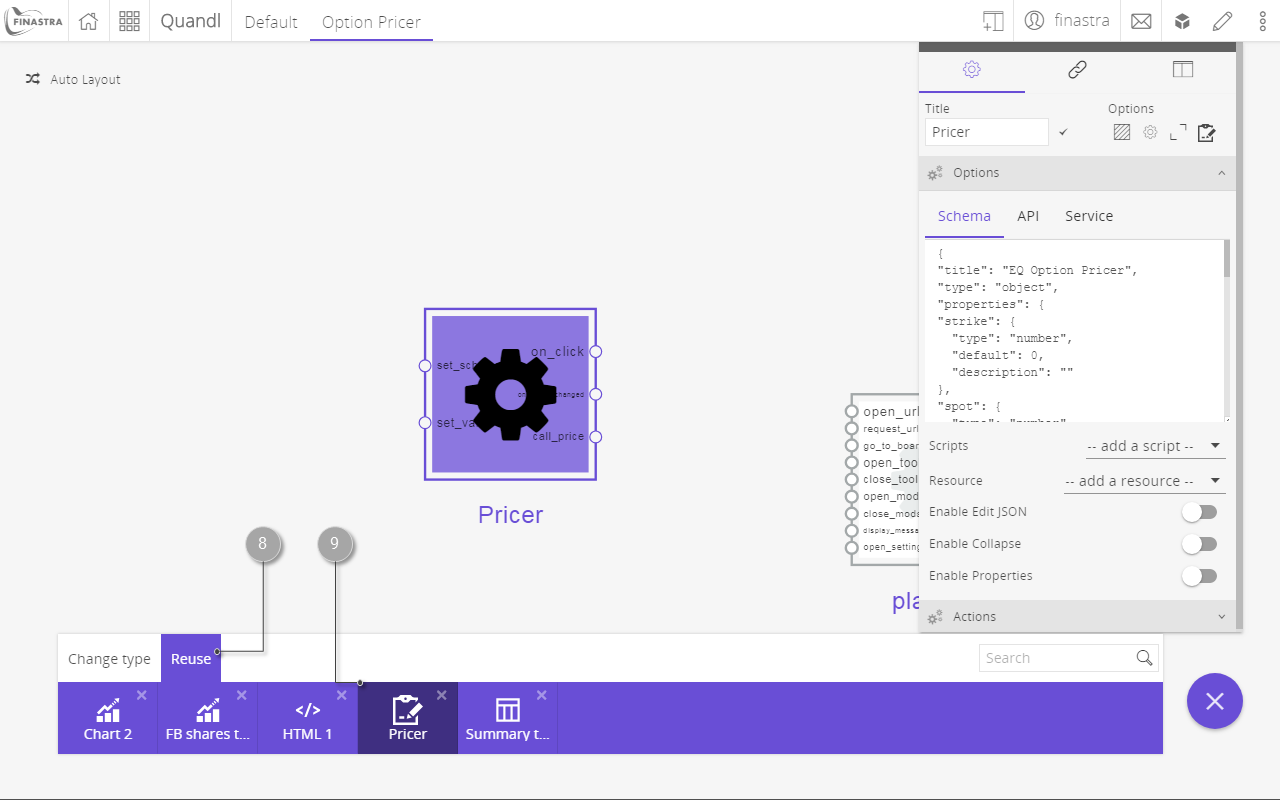
Fig. 69: Add the form to the Link Editor dashboard.
- Click an empty area of the link dashboard to deselect any component, then switch the component toolbar to the New tab.
- Find and select the EQ Option Pricer Flow component. This is the flow that you configured in the Flow Editor mode. This adds the flow to the dashboard, exposing its endpoints.
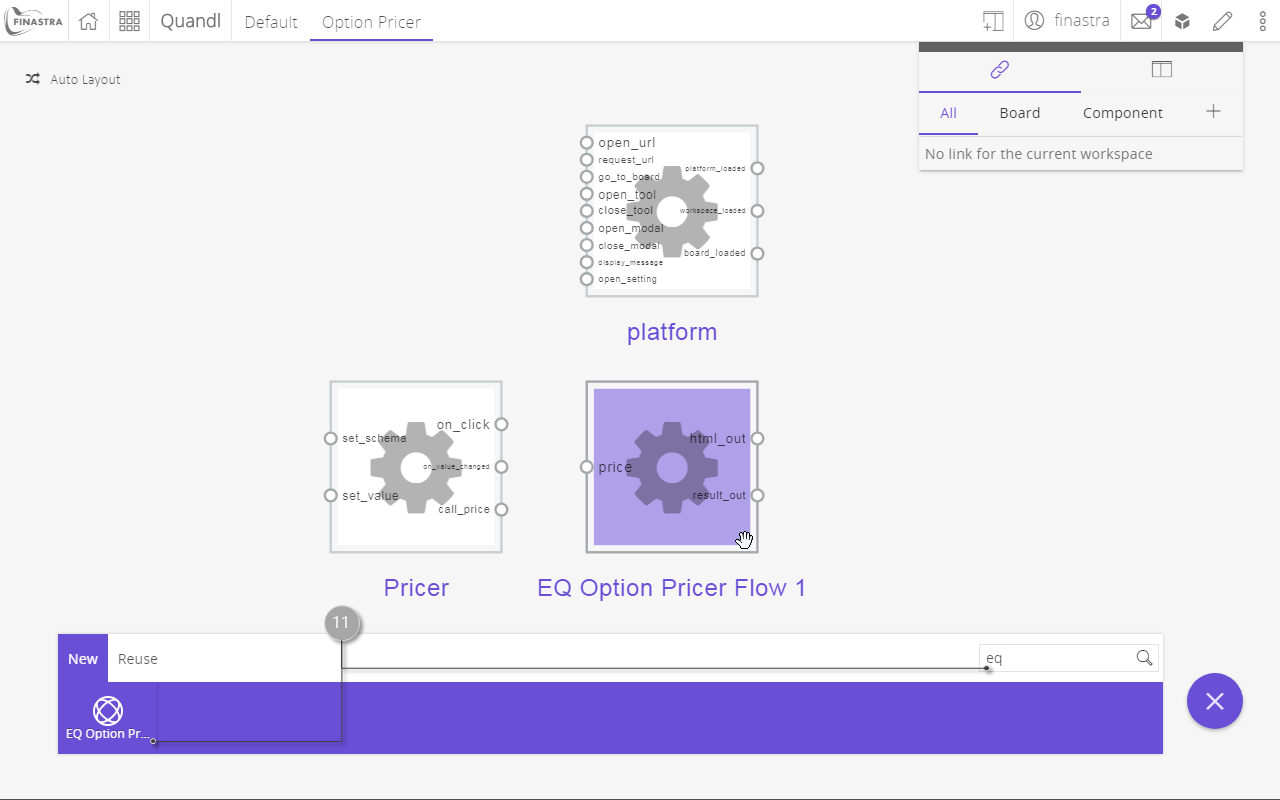
Fig. 70: Add the EQ Option Pricer Flow to the Link Editor dashboard.
- In the same way, add the HTML 1 component. You find it on the Reuse tab of the component toolbar. Drag the components to an appropriate layout.
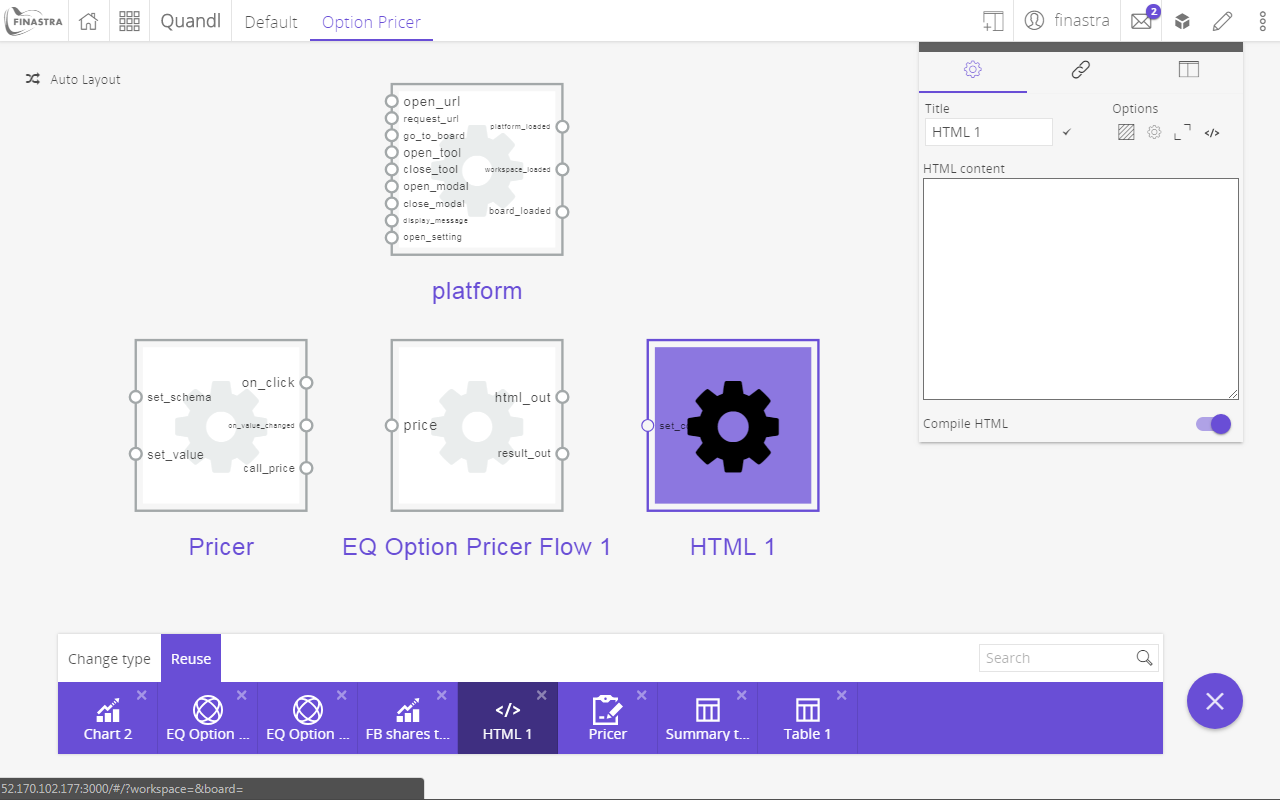
Fig. 71: Add the HTML output to the Link Editor dashboard.
- Link the 3 components.
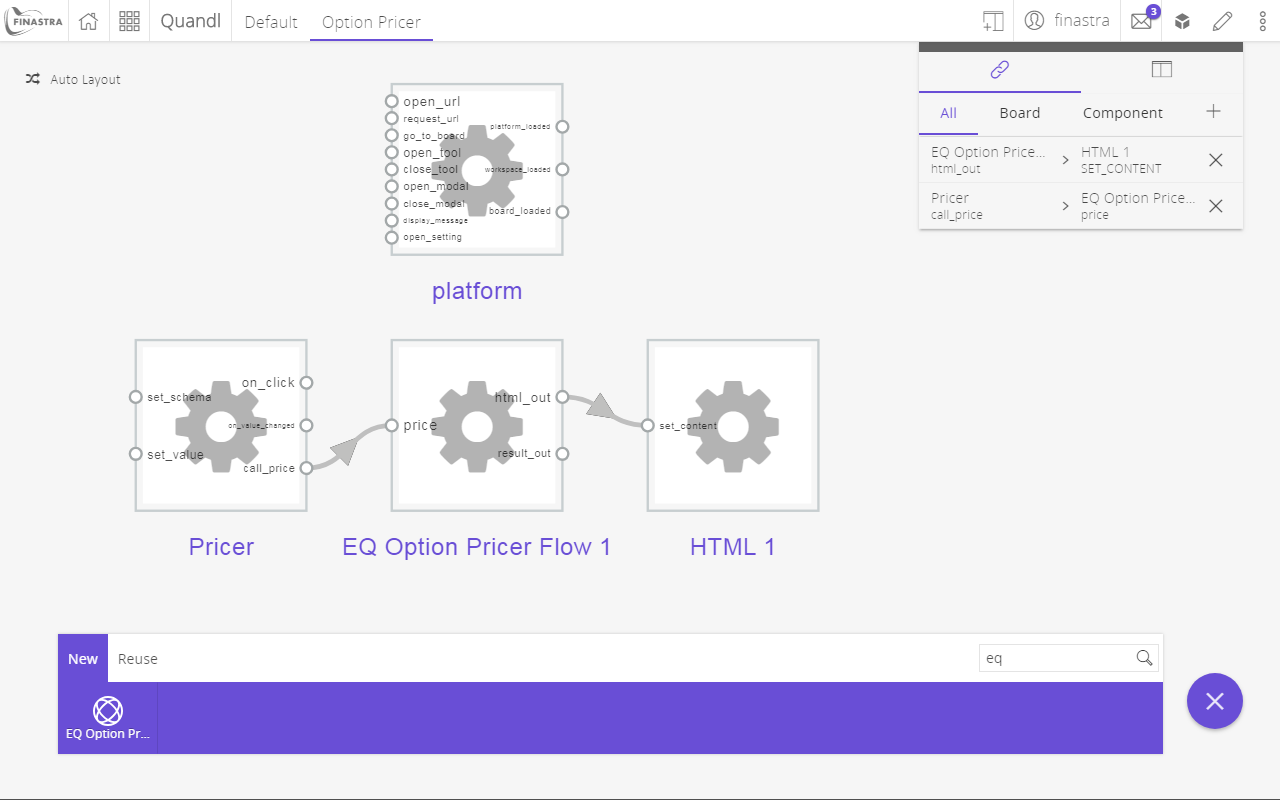
Fig. 72: Link the components together.
- You are now ready to price an option call from the UI. Go back to the Option Pricer dashboard.
- Fill in the EQ Option Pricer form with the appropriate values and click the Price button.
- The result is displayed in the HTML component. You may need to refresh the page to see the updated value. If you encounter this behavior, see the solution from the Known issues section.
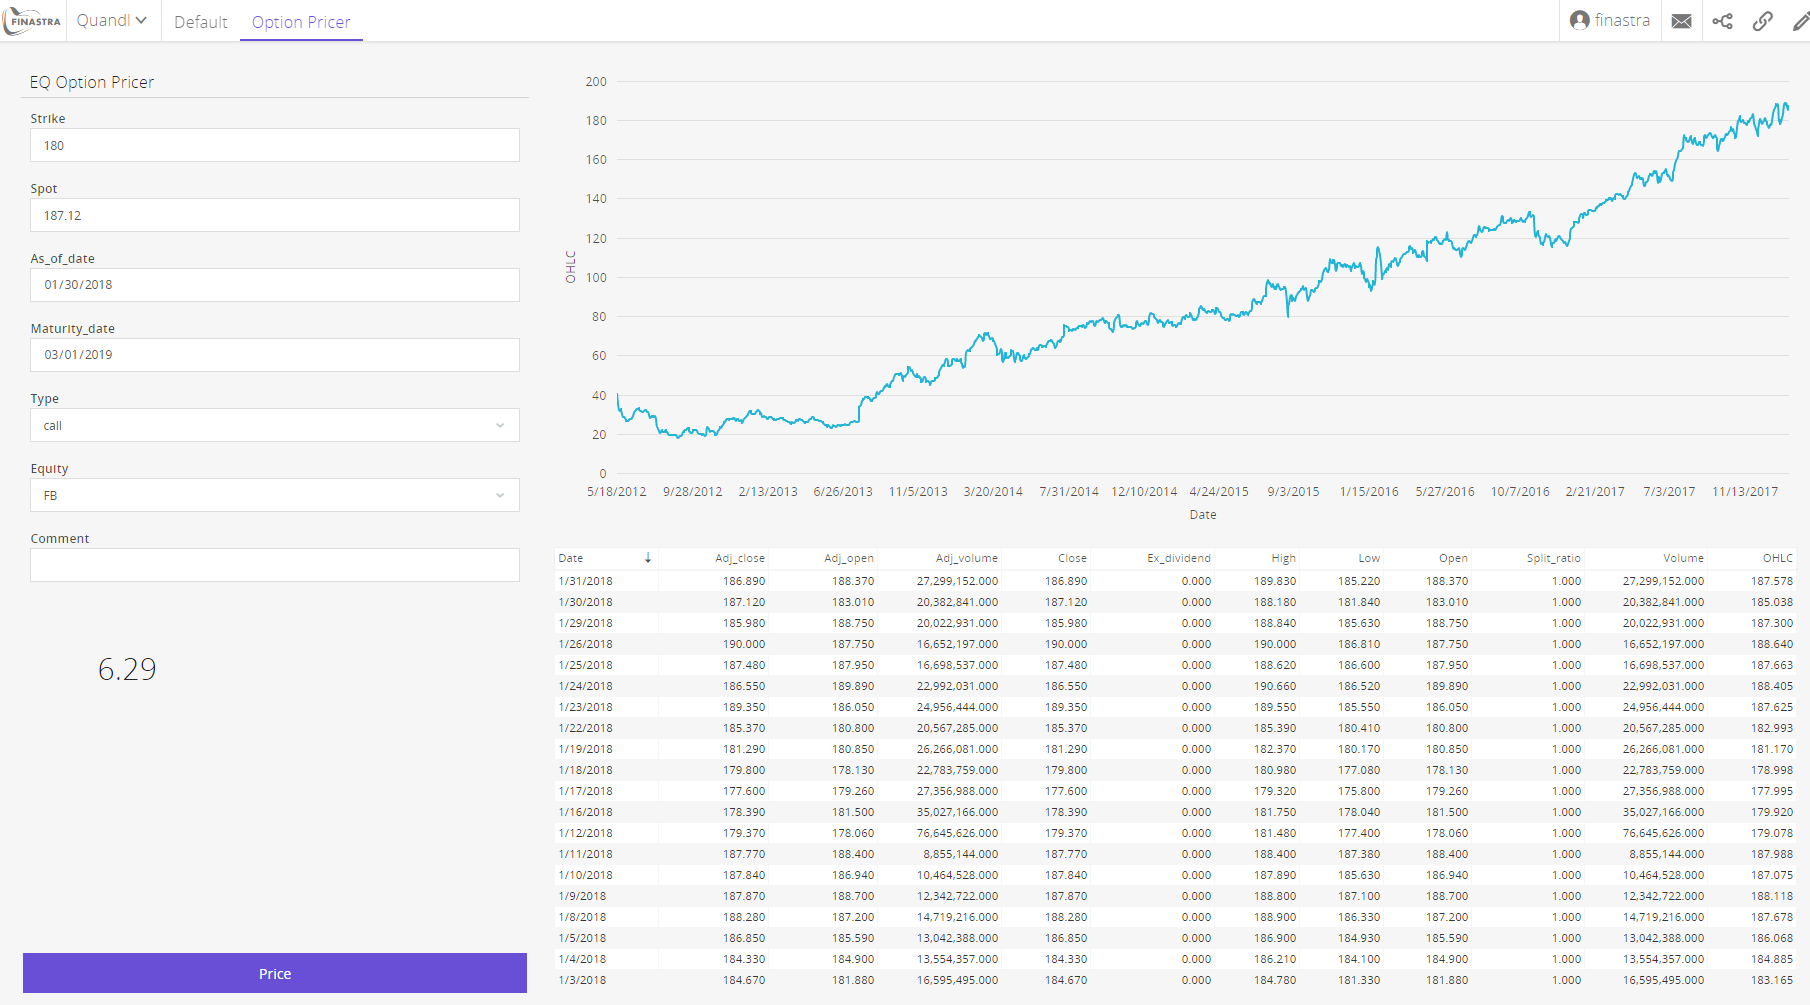
Fig. 73: Retrieve the option price in the UI.