Integrate a Flow into the App
To embed a Node-RED flow into your App, the Flow editor extends the core nodes palette with a set of OpenAPI nodes, MisysBoard input and output nodes, specifically designed to connect them. If the MisysBoard input and output nodes are not wired with the flow, the respective flow cannot be triggered from inside the App.
- From the node palette, select the mb-http-in node and drag it onto the flow workspace.
- Double-click the node to open Edit mb-http-in node.
- In the Edit mb-http-in node:
- Select from the Method drop-down list the HTTP method. In this case, the method is POST because the message is sent from inside the App.
- Type in the URL of the node so it can be triggered RESTfully.
- Type in the Name of the node. This name is later used in the Link editor, as
set_actionfor your flow component.
- Click Done.
- Wire the mb-http-in node with the function node. You can also disconnect the inject node since the flow is now triggered from inside the App.
- From the node palette, select the mb-http-out node and drag it onto the flow workspace.
- Double-click the node to open Edit mb-http-in node and type in the Name of the node. This name is later used in the Link editor, as
on_eventfor your flow component. - Click Done.
- Wire the function node with the mb-http-out node. You can also disconnect the debug node since the flow is now sending the message inside the App.
- Click Deploy. Changes are saved and the flow is activated.
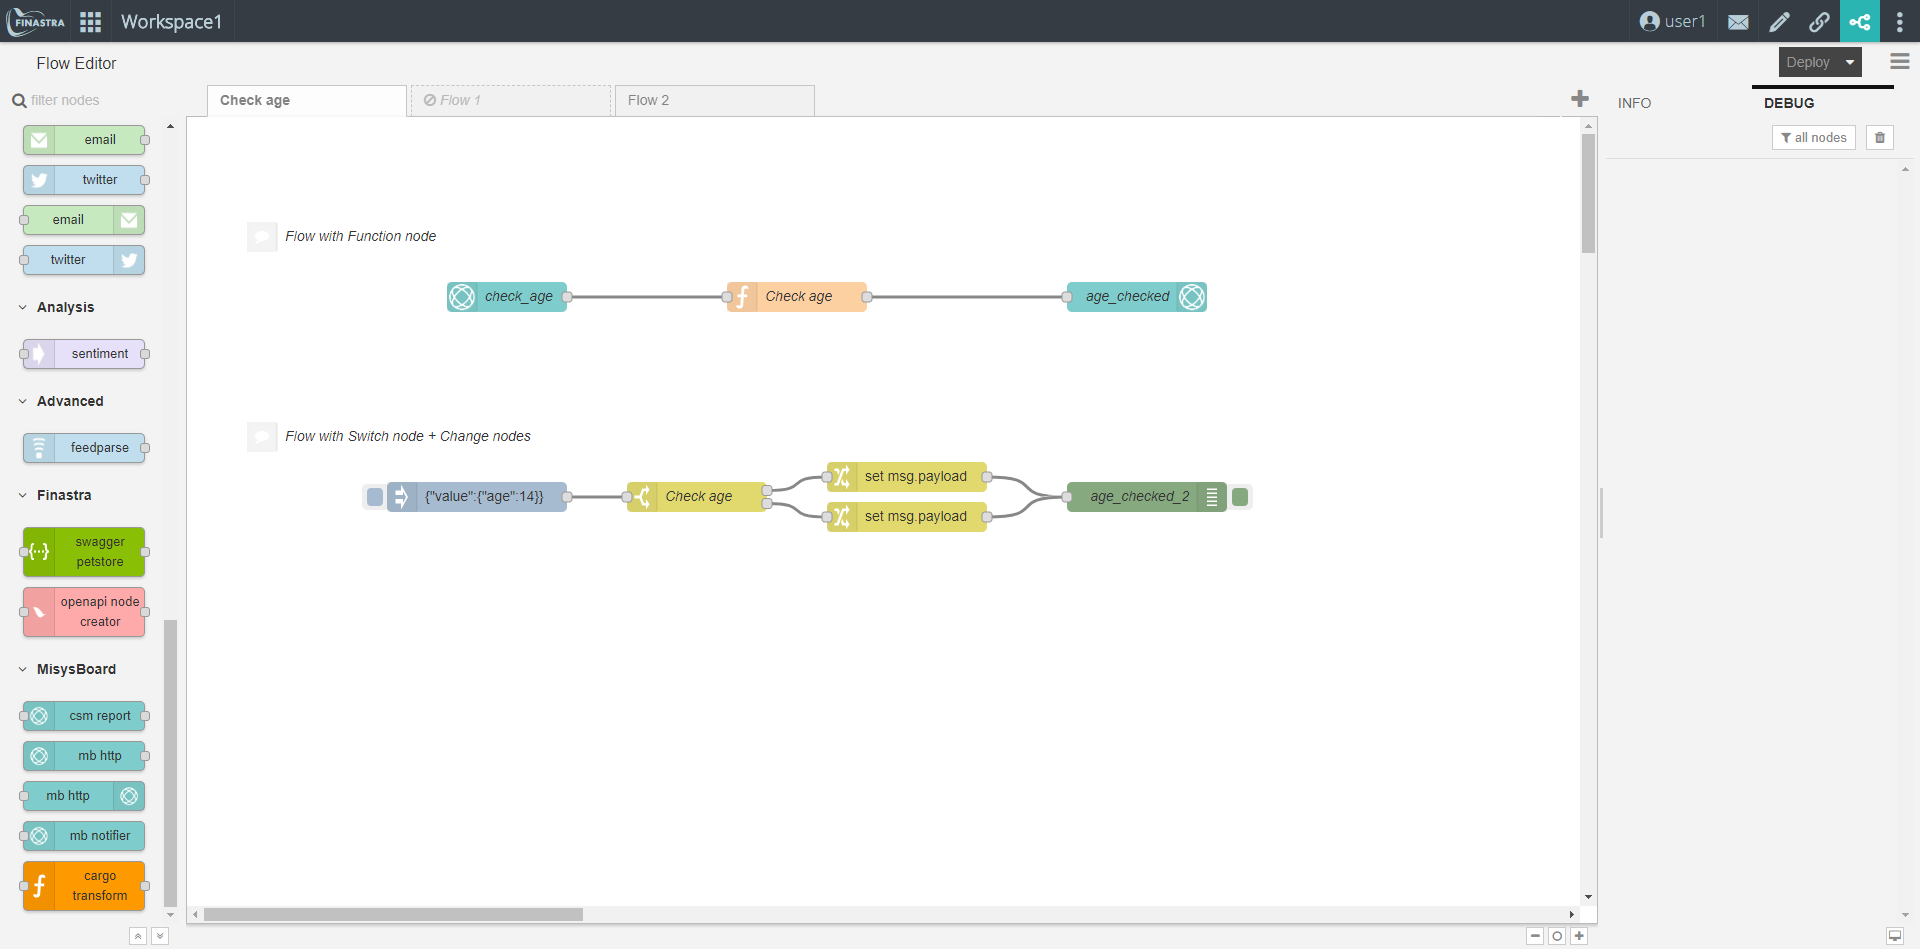
Fig. 10: Connect the Flow with the App using the MisysBoard input and output nodes.
Access the Link editor to finalize the connection between the App and the flow.
The flow is now referenced in the Link editor with the help of a new component that is automatically created once you deploy the flow. It can be searched in the component bar by the name of the flow file. To change the name of the flow component, go back to the Flow editor and double-click the flow file name to open Edit flow where you can type in the new Name.
When added on the design area, the flow component is also represented as a box with incoming actions and outgoing events so it can be linked to other components and to the platform. Its actions and events are determined by the input and output nodes.
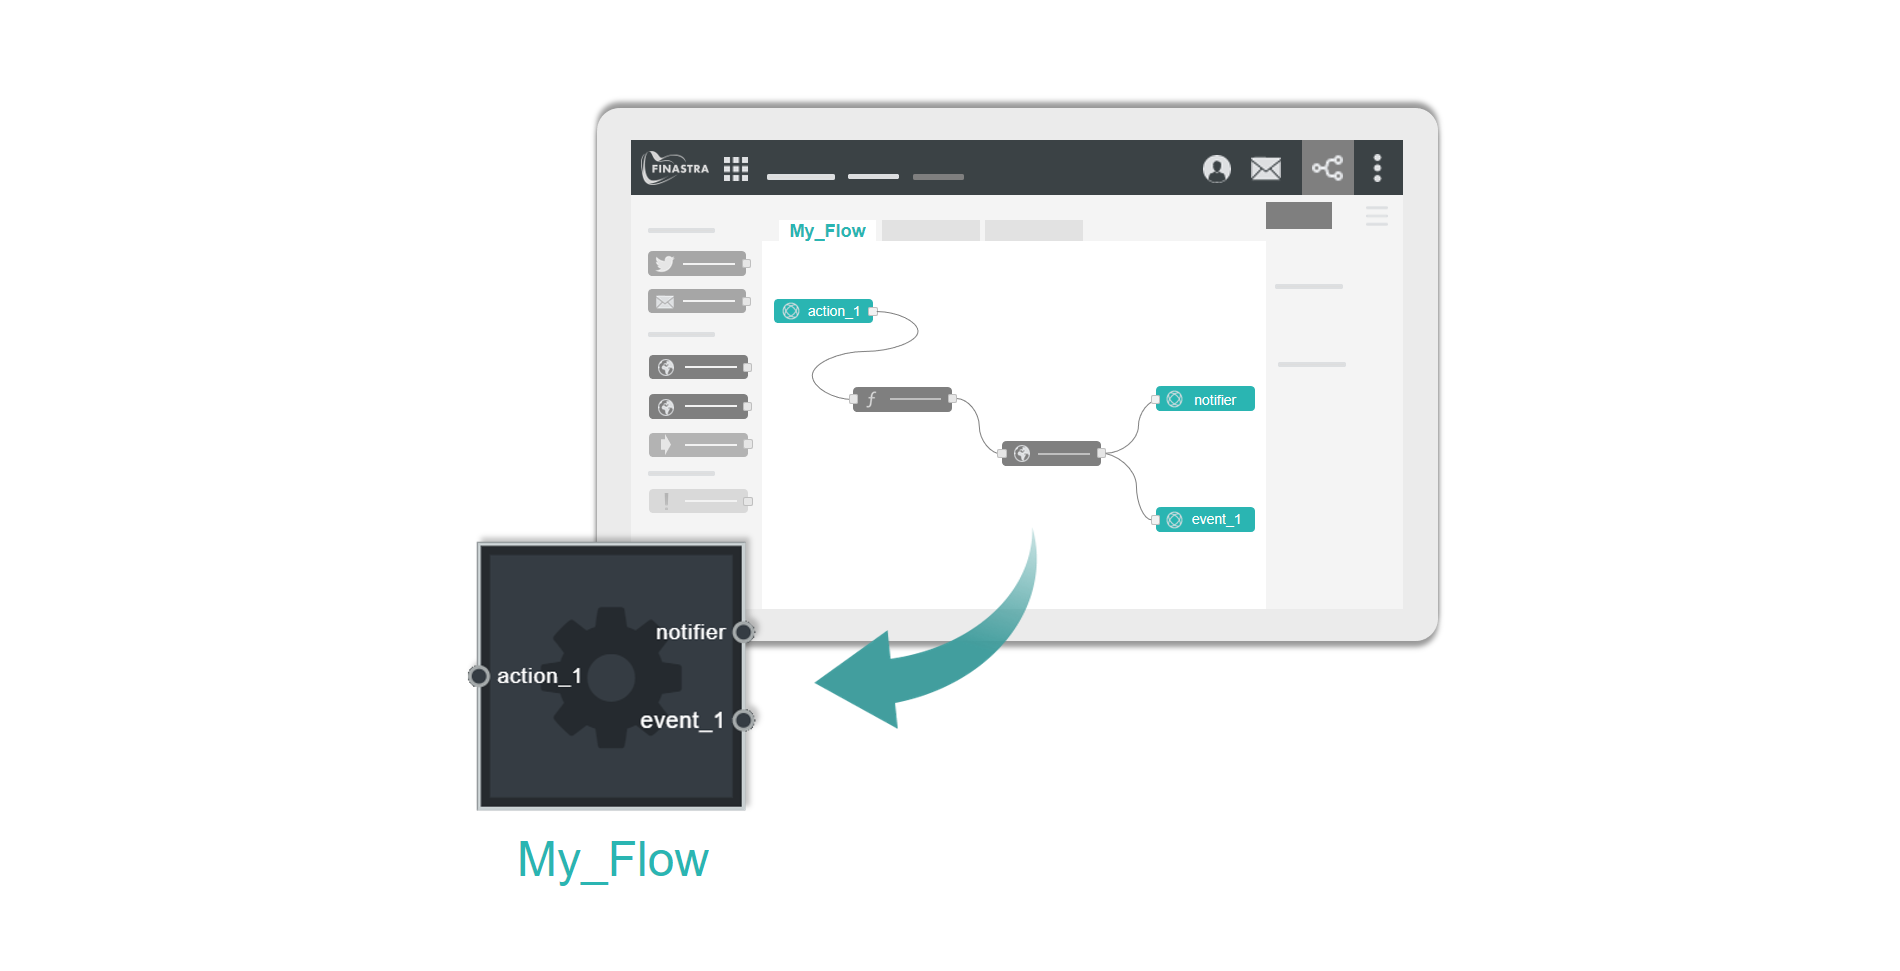
Fig. 11: The Flow represented in the Link Editor.
For example, the Check age component has the check_age action and the age_checked event.
If from the node palette, the mb-http-in and mb-http-out nodes are dragged onto the flow workspace and wired with the second flow, the Check age component is then displayed in the Link editor with the check_age and check_age_2 actions and the age_checked and age_checked_2 events.
To trigger the Check age component from inside the App, a Form component can be used to send the message.
- Select the Form from the component bar. The component configuration is enabled in the configuration panel.
- In the component configuration, click the Options drop-down and select the Schema tab.
- Insert a basic JSON Schema like the following:
{
    "title": "Person",
    "type": "object",
    "properties": {
        "firstName": {
            "type": "string"
        },
        "lastName": {
            "type": "string"
        },
        "age": {
            "description": "Age in years",
            "type": "integer",
            "minimum": 0
        }
    },
    "required": ["firstName", "lastName"]
}- Click the Actions drop-down and create an action by clicking . Type in the Display name to label the action for the form button and the Action name to label the action for the form component in the Link editor.
For example, use “check” for both Display name and Action name fields.
The Form component can now be linked with the Check age component.
- From the
checkconnection port in the Form component drag a link to thecheck_ageconnection port in the Check age component.
Then use the Platform to display the message coming from the flow in the App:
- From the
age_checkedconnection port in the Check age component drag a link to thedisplay_messageconnection port in the Platform.
The Flow is now integrated into your App.
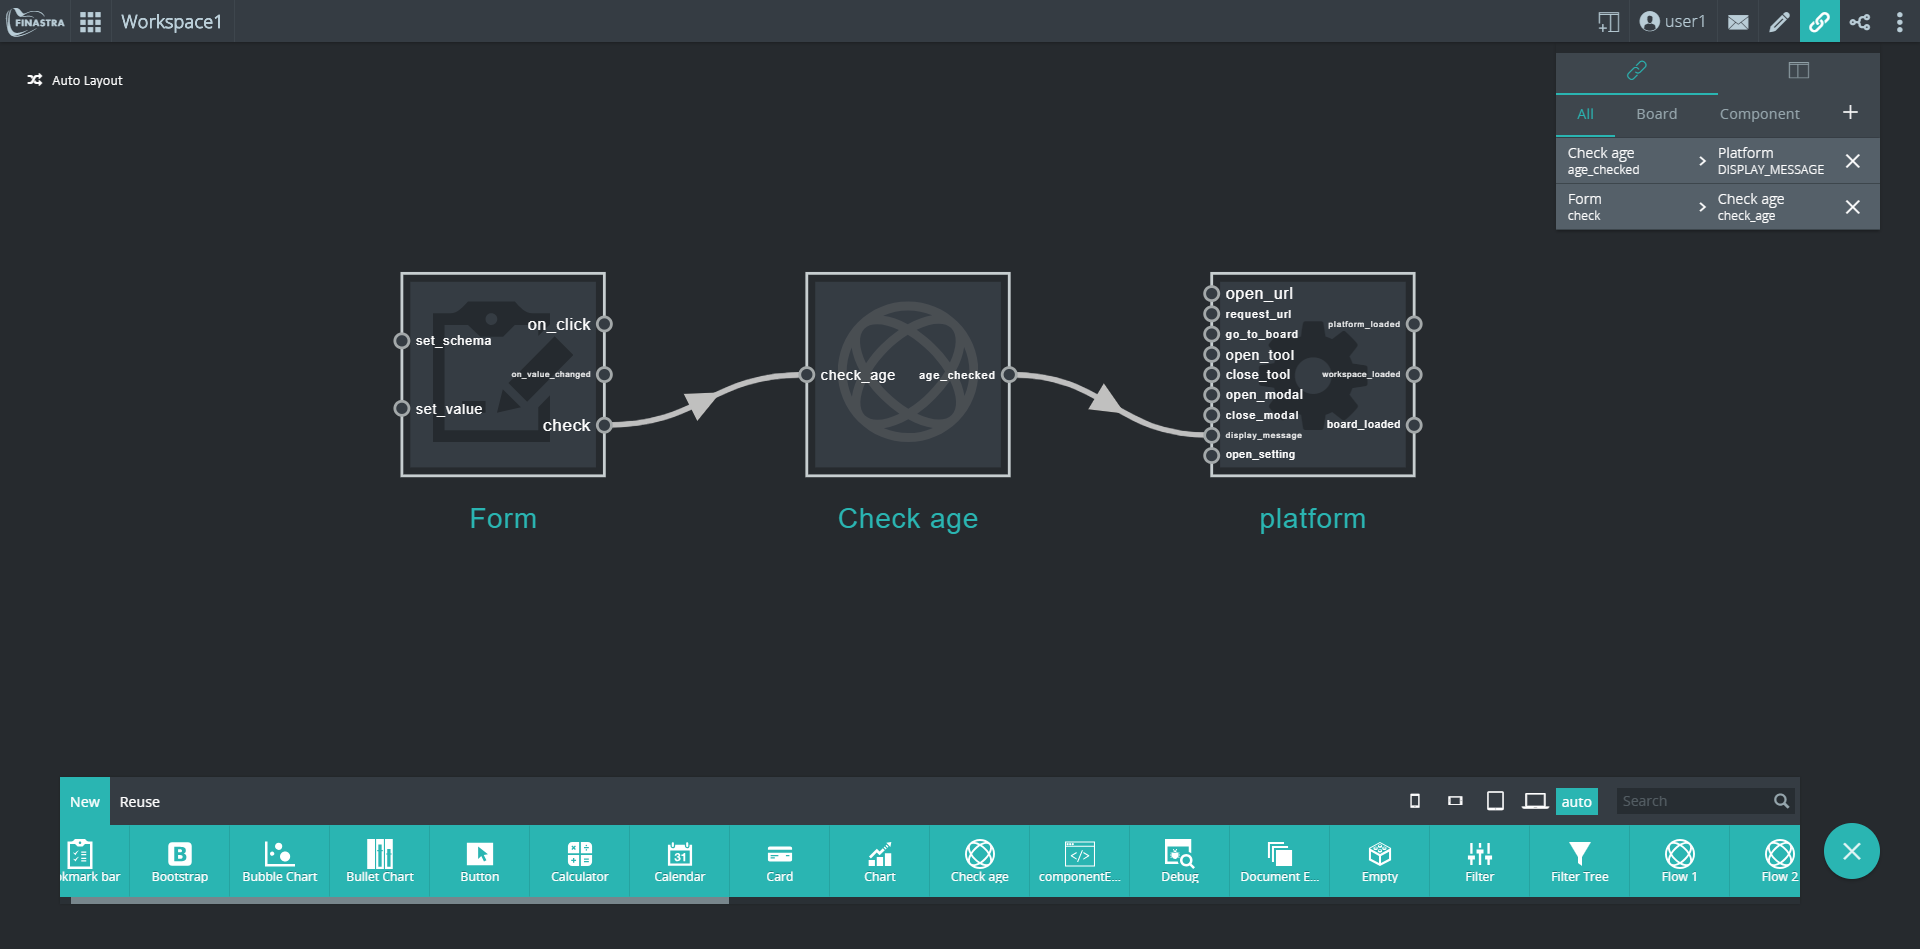
Fig. 12: The Flow Linked with the App.
Access the Design mode from the top navigation bar and place the Form component on one of your boards. You can find your Form component in the component bar, when Reuse tab is selected. Click to close Design mode. Enter the required data for the form fields and click Check. A notification is displayed with the response.
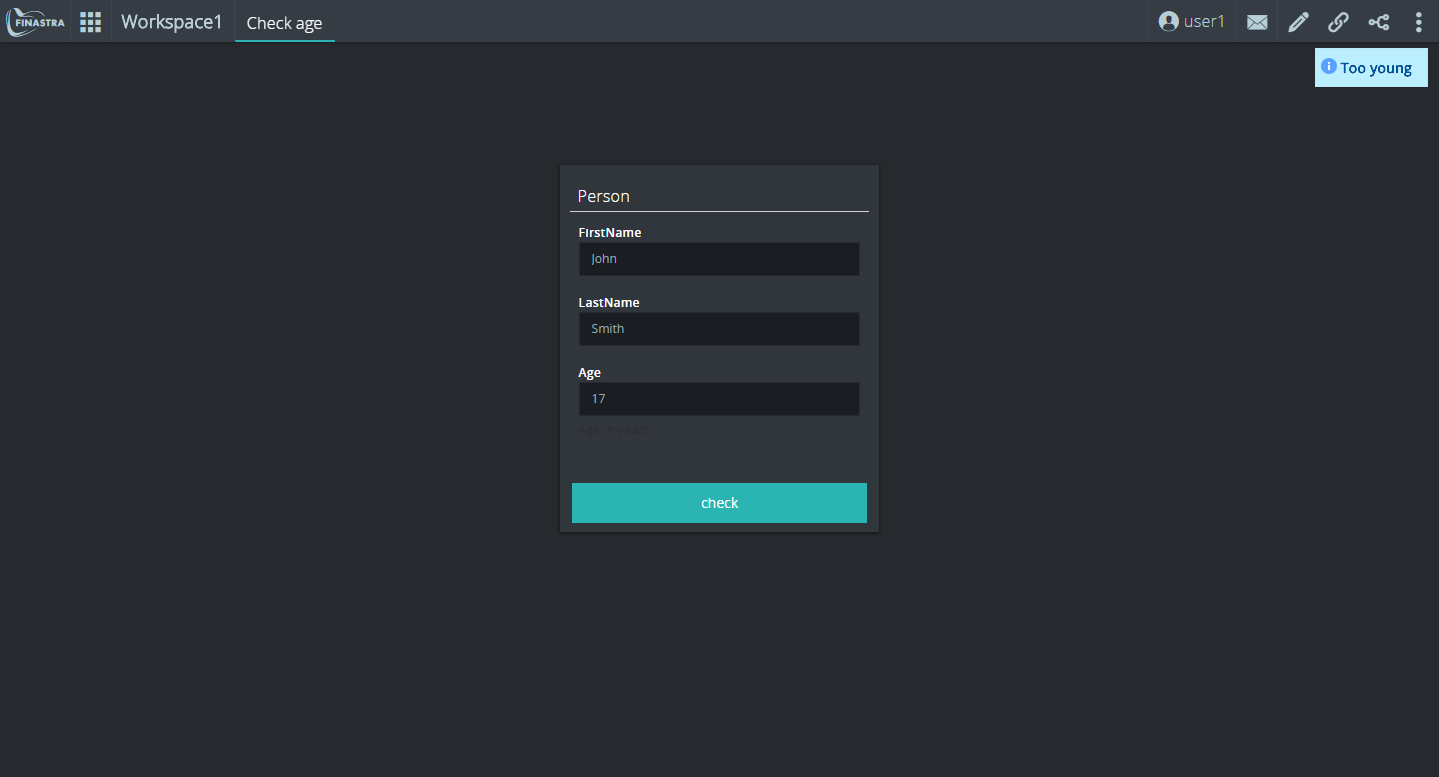
Fig. 13: The Flow Triggered from Inside the App.
For other examples on how to use the flow-based programming capabilities, see the Node-RED documentation.