CSV Data Import
Overview
This is an easy solution for data import. You can import a CSV file or directly write CSV data in the CSV Editor. The imported data is stored in a cube.
Import Data from a CSV file
To import a CSV file
On the Data source editor, select CSV Data Import. The CSV Data Import page opens.
- Click Chose CSV file to upload your CSV file, as shown in fig. 16, point i. Alternatively, you can import the data using the following methods:
- Drag a CSV file from your computer to the drag & drop area.
- Click Open CSV editor to open an editor where you write down a CSV table.
(Optional) Click Configure separators to change the default column, decimal and vector values separators, as indicated in fig. 16, point iv.
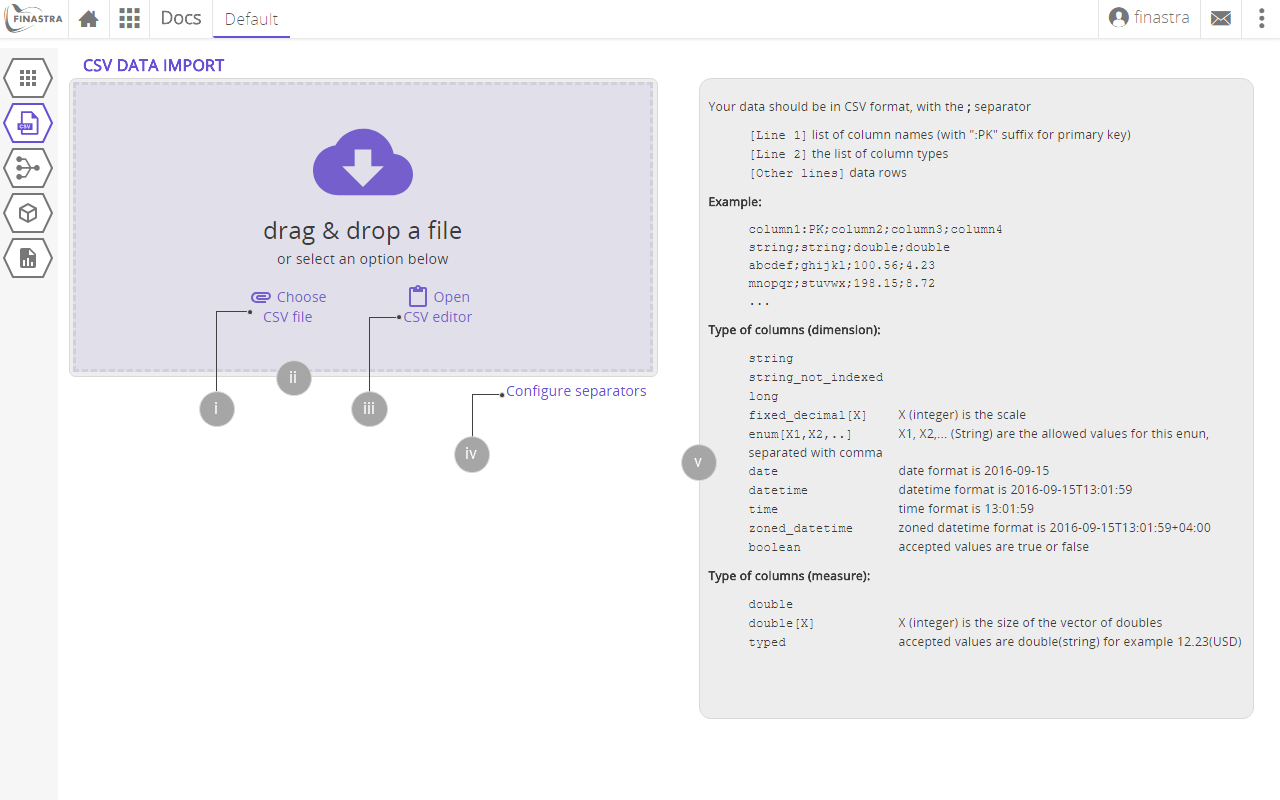
Fig. 16: The CSV Data Import page where you select your CSV file to import.
- Check the name of the cube that you are going to use to store the data, then click Import. The concept of cube is described in more detail in About Cubes. FusionCreator App Builder displays a confirmation message on the page if your data was successfully imported.
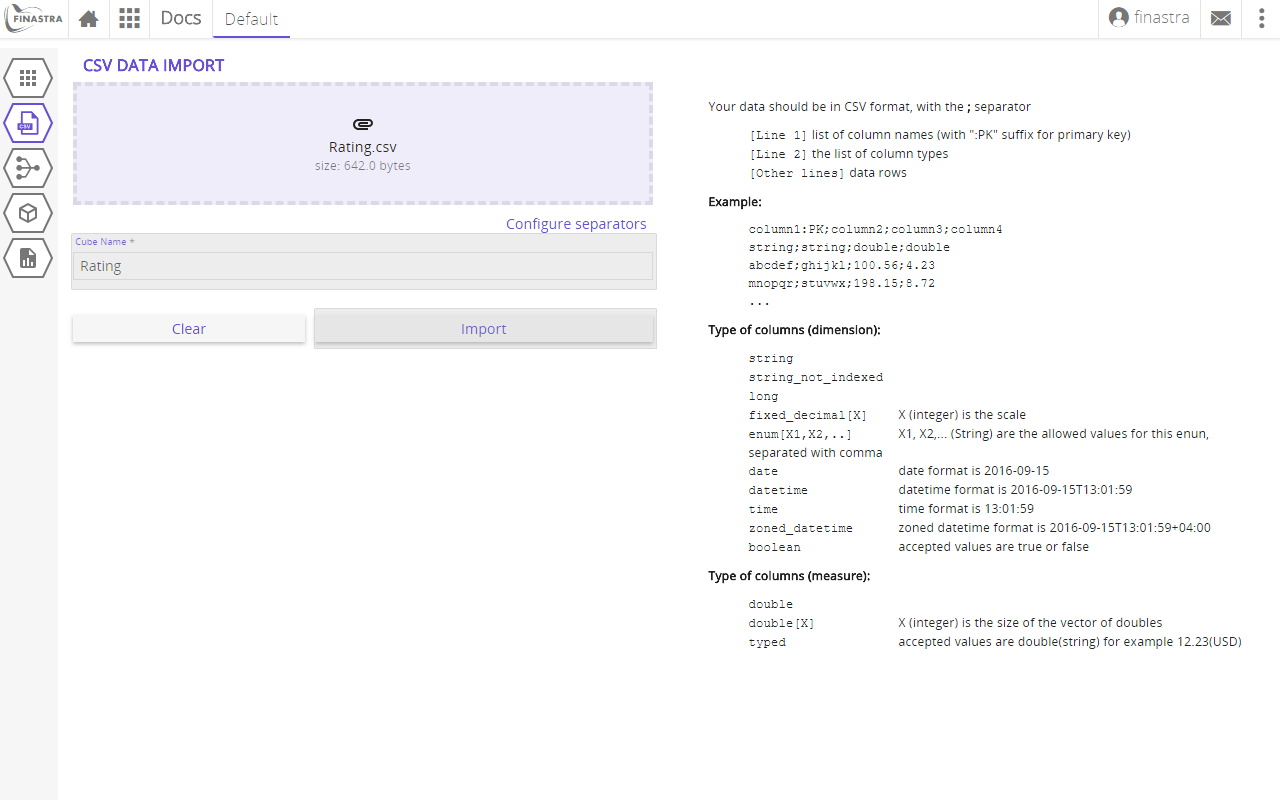
Fig. 17: Importing the CSV data into a cube.
- (Optional) Enter the name of the report that you will use to manipulate the data, then click Generate the report. This step is optional because you can create the report later, as described in About reports.
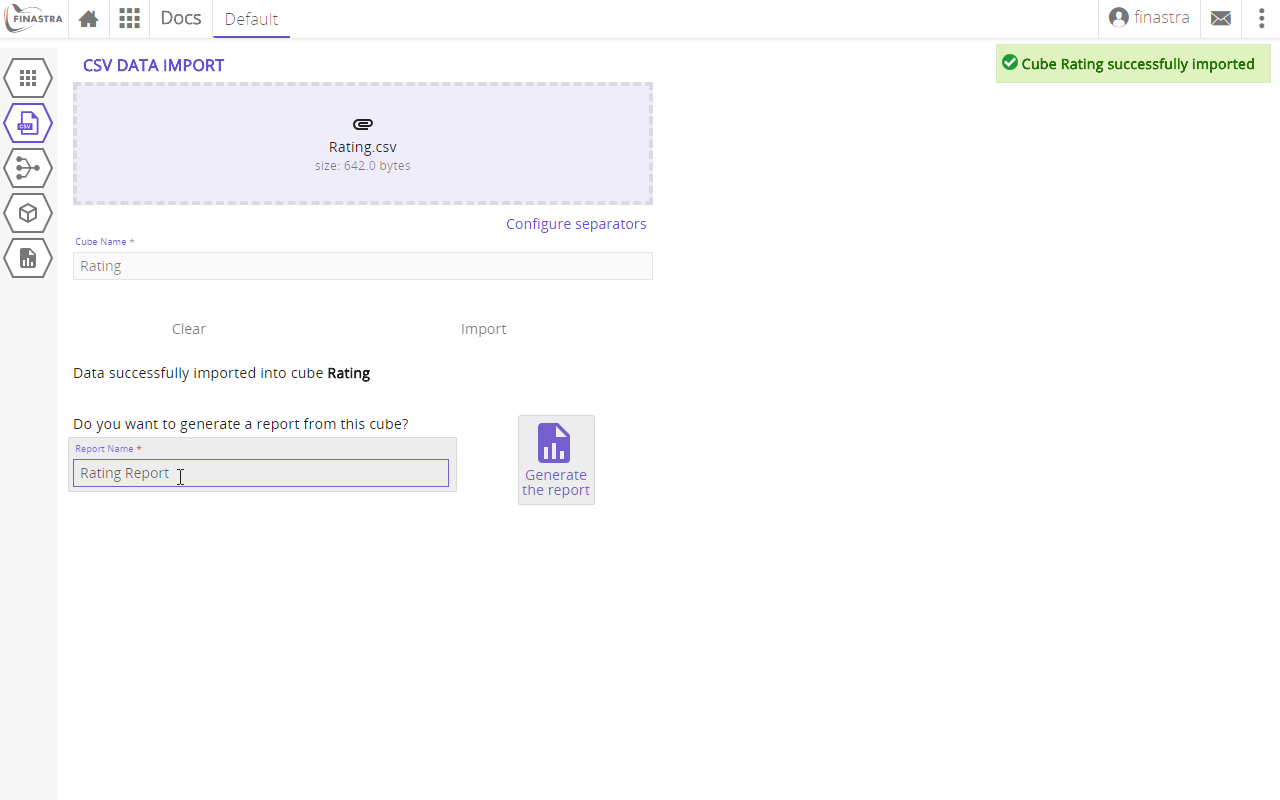
Fig. 18: Confirmation of a successful CSV import and, optionally, report creation.
The procedure is illustrated in the following animation:
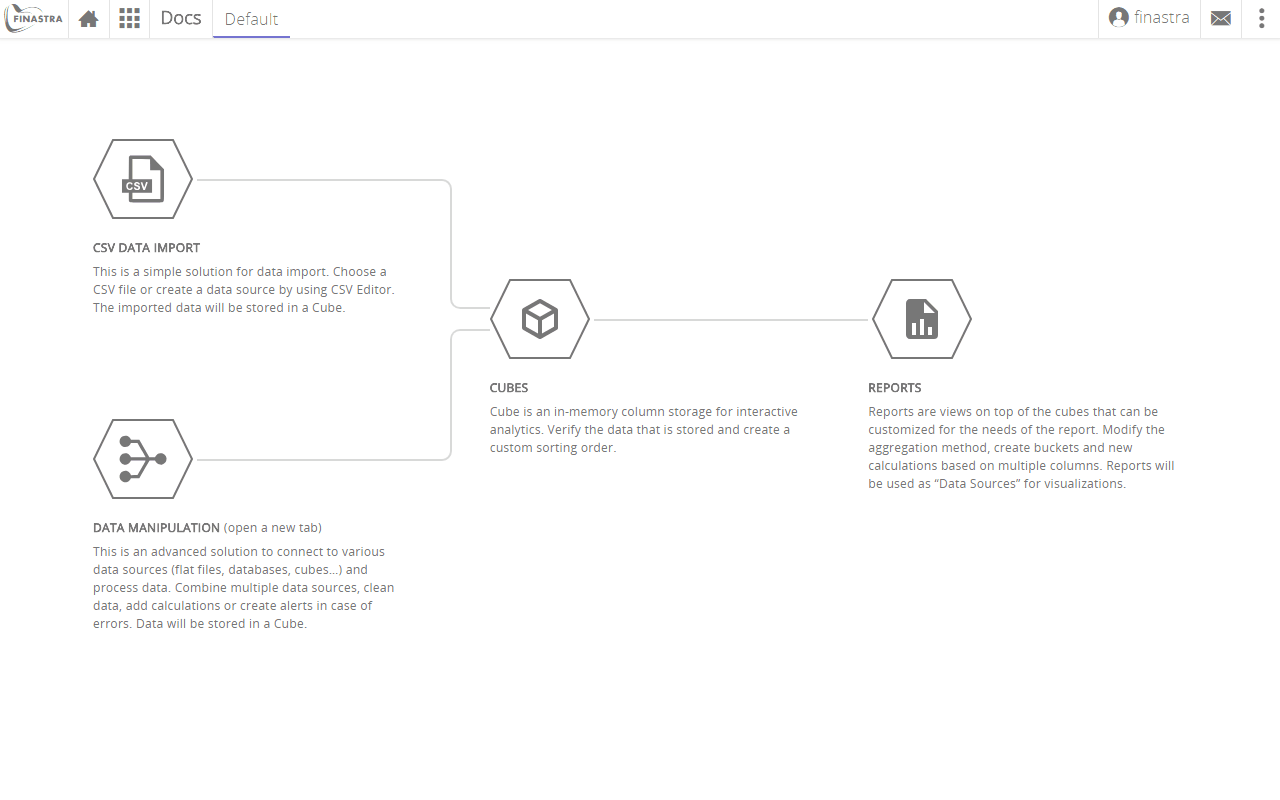
Fig. 19: Importing the CSV data into a cube.
CSV File Formatting Rules
The following rules must be applied to the CSV data source file that you want to import:
- The default column separator is the semicolon (
;). You can overwrite it using the Configure separators option. - On line 1, store the column names. You must define a primary key for your data. Append
:PKto the name of the column that you define as primary key. - On line 2, store the data type of the corresponding column.
- On the following lines, store your data.
- Use one of the data types listed in the right side area of the CSV Data Import page under the Types of columns (dimension) and Types of columns (measure) lists. See the fig. 16, point v.