Create a Workspace
To create your first workspace
- Type the name of your workspace in the Create a workspace field.
- Press Enter to continue. You are directed to the Workspaces menu.
- (Optional) Click to close the Workspaces menu.
To create a workspace using Workspaces menu
Click the Workspaces menu. The existing workspaces are displayed.
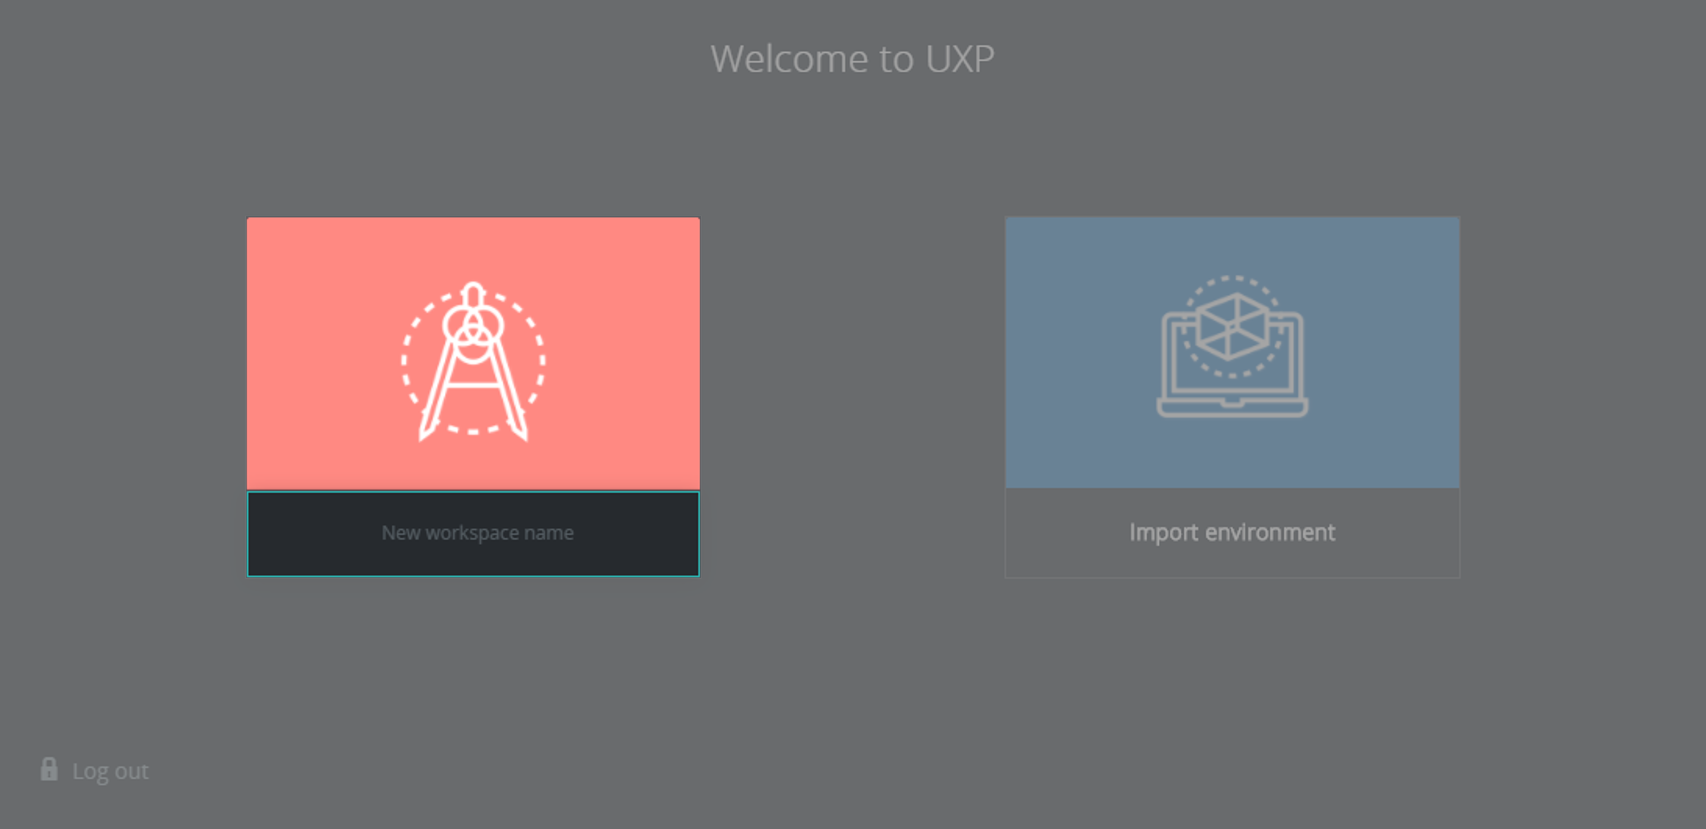
You can view your workspaces in Card view or in List view by clicking or .In Card view, click New workspace to open the New workspace form.
OR
In List view, click the top-right icon button to open the New workspace form.To set up the New workspace:
Name - Type the name of the workspace.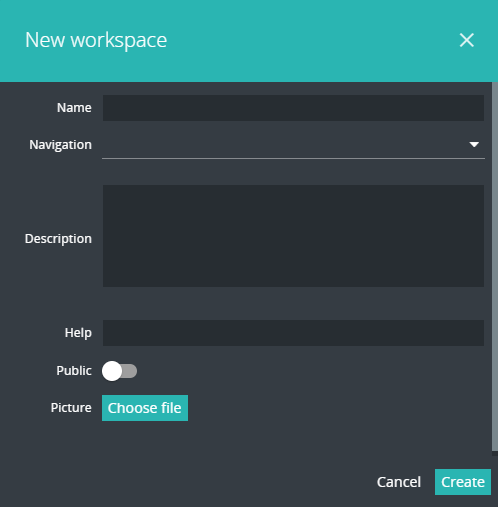
Navigation - Select one of the following options to customize the transition between boards:- Horizontal
- Vertical
- Fade
- in List view, next to the workspace name.
- in Actions > Workspace Information .
Help - (Optional) Enter a URL. The URL is displayed when you click Actions > Workspace Information .
Choose file - (Optional) Click to add a picture. The picture is displayed when you use Card view.
Create - Click to create the new workspace. It than appears in the list and it is automatically selected.(Optional) Click to close the Workspaces menu.