Best Practices
The following set of best practices offer some guidelines to help you keep large and complex flows maintainable over time.
Use Keyboard Shortcuts
You can perform common operations faster, with less effort.
You can perform operations that require precision more accurately.
The most common keyboard shortcuts are as follows:
Select all nodes: Ctrl + a
Select all connected nodes: Shift + click
Copy selection: Ctrl + c
Cut selection: Ctrl + x
Paste selection: Ctrl + v
Delete selection: Delete
To access the full keyboard shortcuts list, use either one of the following options:
- Menu > Keyboard shortcuts.
- Menu > Settings > Keyboard.
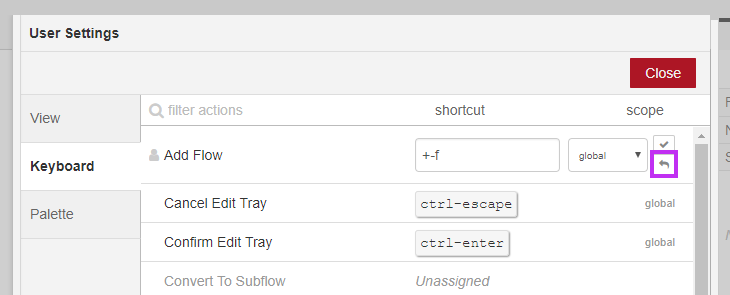
To customize a shortcut
- Click the shortcut in the list. The action menu is displayed.
- Edit its current assigned commands. Actions with unassigned shortcut are customizable too.
- Click the confirmation icon to save changes. The action is now tagged in the list with the user icon, meaning the shortcut is customized by the user.
To revert to the original assigned commands
- Select the shortcut from the list. The action menu is displayed.
- Click the revert icon. The original commands are now assigned and the user icon is removed.
Wire Nodes
You can create complex flows without having to worry about the node wiring logistics.
You can maintain a cleaner development environment by enabling automatic alignment for nodes.
To wire a node, click and drag a wire from the output port of a node to the input port of a different node.
To wire a node within a flow, drag a node from the palette between two nodes already wired together. When the wire becomes dashed, release the node.
To move multiple wires from one node to another, hold the Shift key and drag the node port from its current location to the new one.
Note: If multiple wires are connected to the same port and you want to move just one of them, first select the wire and then hold the
Shiftkey and drag the node port from its current location to the new one.
To enable grid lines for nodes display
- Click Menu > Settings > View.
- Select any of the following options:
- Show grid – make grid lines visible.
- Snap to grid – automatically align nodes.
- Grid size – customize de distance between lines.
- Click Close.
Reuse Functionalities
You can implement code snippets for function nodes or subflows instead of rewriting or recreating the same functionality over and over again.
You can avoid having node-crowded flows by using subflows.
Function Nodes
The function node provides the possibility to save its code to the function library and to reuse it for other function nodes.
To save a Function code to the library
- Double-click the function node. The Edit function node panel is displayed and you can see the Function code you want to save.
- Next to the Name field, click the Library drop-down menu.
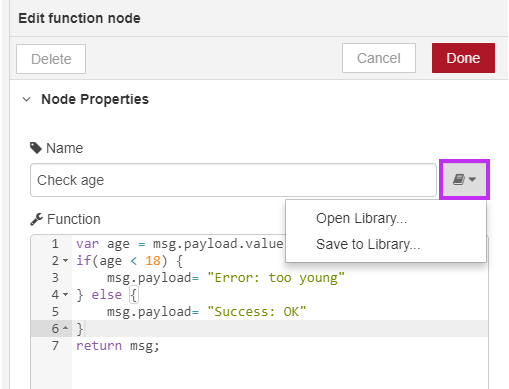
- Select Save to Library…. The Save to Library… dialog is displayed.
- Type the name of the Folder or provide a directory structure.
- By default, the Filename is the name of your function node with the
.jsextension. You can change its name or leave it as it is. - Click Save.
To load a Function code from the library
- Double-click the function node. The Edit function node panel is displayed.
- Next to the Name field, click the Library drop-down menu.
- Select Open Library…. The function library is displayed and you can navigate through your folder structure to find the file you want to load.
- Click Load.
Subflows
Subflows provide the possibility to save more than a piece of function code. You can save a set of connected nodes as a single subflow node and integrate it within larger flows. Subflows are useful if you want to reuse functionality blocks or to avoid having to many nodes in a flow.
After you create your first subflow, the Subflows section appears in the node palette to display all your subflows.
You can create a subflow from scratch or select a set of nodes to move to a subflow.
To create a subflow
- Click Menu > Subflows > Create Subflow. The subflow node is automatically added to the palette and the subflow file opens so you can create the subflow.
- Click inputs and outputs in the top menu of the subflow file to add input and output ports to the subflow node.
- Close the subflow file. The subflow node is automatically saved and you can use it within your flows.
To move nodes selection to a subflow
- Select the nodes you want to move to a subflow.
- Click Menu > Subflows > Selection to Subflow. The nodes selection is replaced with a subflow node which is also displayed in the Subflow section of your node palette.
To edit a subflow
- In the node palette, double-click the subflow node to open the subflow file you want to edit.
- The subflow file diplays a menu with the following options:
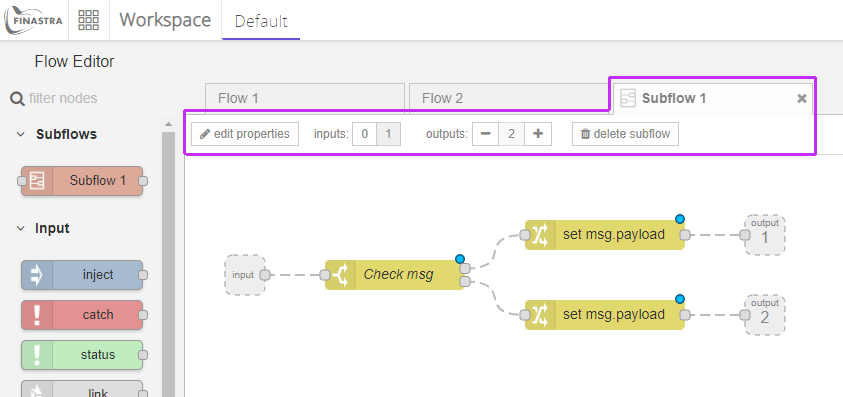
- edit properties – rename the subflow node or add a Description.
- input – add or not an input port to the subflow node.
- output – add or not output ports to the subflow node.
- delete subflow – delete if you no longer need the subflow.
- Edit the subflow.
- Close the subflow file. The changes are automatically saved.
Note: Changes within a subflow node apply to all its instances.
Document Flows
You can track changes as the project becomes larger and complex.
You can provide further details regarding a flow configuration or a node functionality.
You can review or exchange information with other people involved in the same project.
You can use any of the following options for documenting a flow:
- The comment node – this option is preferable for local comments or information, because you can place the comment node anywhere in a workspace.
- The flow description – this option is preferable for overview information, because the flow description is displayed in the sidebar when the flow file is selected.
To document a flow using comment nodes
- From the node palette, in the function nodes section, select the comment node and drag it onto the flow workspace.
- Double-click the node. The Edit comment node panel is displayed.
- Type the Title of the node.
- Add more details in the Body.
- Click Done.
To document a flow using flow descriptions
- Double-click a flow file. The Edit flow panel is displayed.
- Add a brief Description for the flow. For example, you can include the flow functionality or its author.
- Click Done. You can see the information in the sidebar when the flow file is selected.
Import/Export Flows
You can share flows through a simple text format.
You can back up flows in case of a data loss event.
You can restore a previous version of the project.
The locations where you can load or save your flows are:
- The local system clipboard – this option allows you to store data in text format.
- The library on the system running Node-RED – this option allows you to better organize the stored data by using directory structures.
To export a flow to the clipboard
- Select the nodes you want to export. The nodes are highlighted.
- Click Menu > Export > Clipboard. The Export nodes to clipboard dialog is displayed.
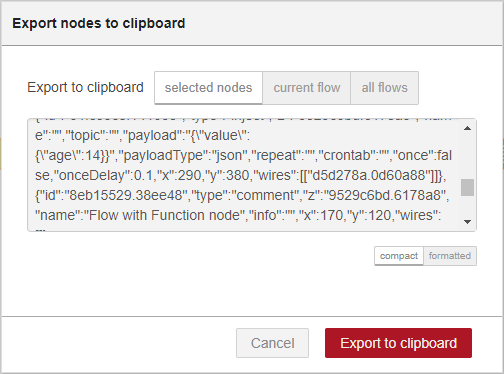
- Select one of the Export to clipboard options:
- selected nodes – export just the selected nodes.
- current flow – export the entire flow file, not just the nodes.
- all flows – export all flow files.
- Click Export to clipboard.
To export a flow to the library
- Select the nodes you want to export. The nodes are highlighted.
- Click Menu > Export > Library. The Export nodes to library dialog is displayed.
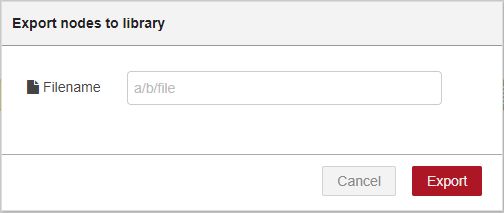
- Type the Filename or provide a directory structure to organize the flows you save. For example, “myflows/flowname1”.
- Click Export. The nodes are now saved to the Library.
To import a flow from the clipboard
- Click Menu > Import > Clipboard. The Import nodes dialog is displayed.
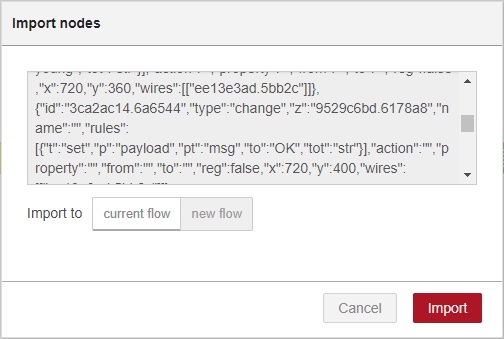
- Paste the text in the dialog and select one of the Import to options:
- current flow – import the flow to the current flow file.
- new flow – import the flow to a new flow file.
- Click Import. The flow is now imported and you can click anywhere in the workspace to anchor it.
Note: If the current flow or all flows were exported, then these flows are recreated as separate tabs when imported, even if the Import to current flow option is selected.
To import a flow from the library
- Click Menu > Export > Library and navigate further through your organized structure to find the flow you want to import.
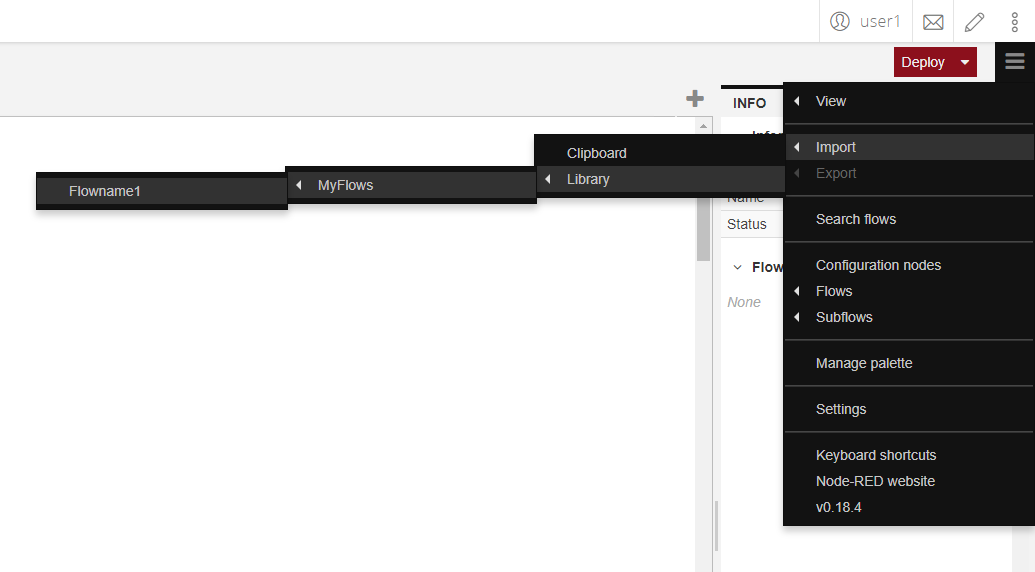
- Click anywhere in the workspace to anchor the flow.